Blog

  • RV Renovation: Flooring Swap

    RV Renovation: Flooring Swap

    Traveling in an RV is a fun experience that anyone of any age or background can enjoy. There’s nothing like road tripping with a kitchen, bathroom, bedroom, and more at your constant disposal, and more people than ever are hitting the road to see just what it’s all about. But what happens when you want to buy an RV, but you don’t care for the interior style? Your best solution is to take on some renovations.

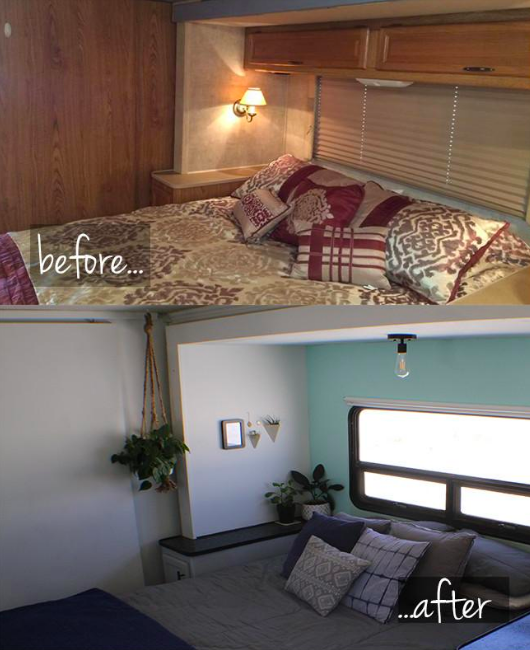
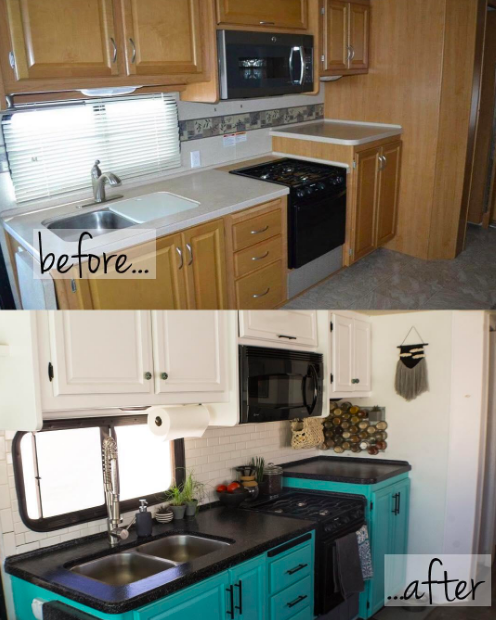
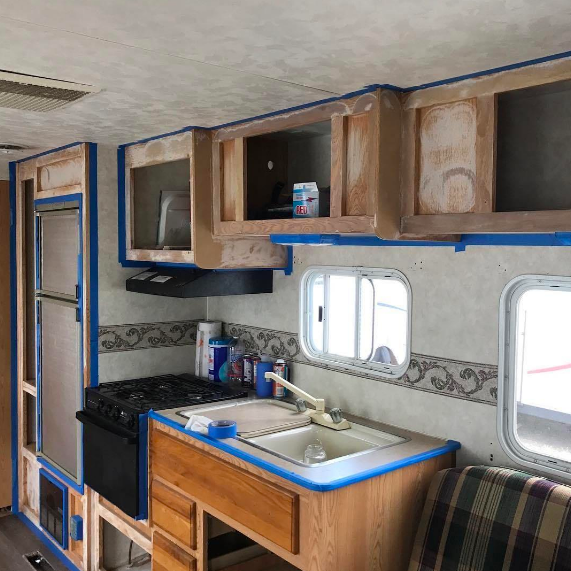
    Renovating an RV interior is a challenging and time-consuming project, but it results in a finished product that you will love because you designed it yourself. Painting is typically the first project in remodeling an RV, and there are many steps to painting, as discussed in the two previous posts.

    After painting, you will want to replace your RV’s flooring next. This is another tricky yet satisfying project that yields fantastic results. Follow along with these seven basic steps for a fool-proof guide to laying new floors in your RV.

    1. Remove the old floor

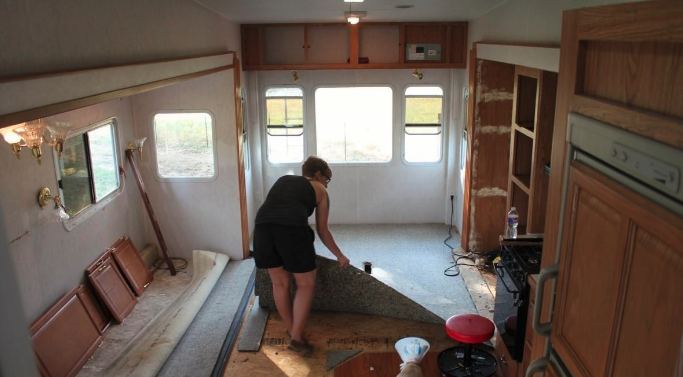
    Before you can even envision the new flooring in your RV, you will need to remove the old floor. Most RVs are carpeted, and if we’re being honest, removing the carpet can be a pain. First, you will need to pull the carpet away from the walls using pliers. Once the carpet is no longer sealed around the corners and edges of the room, you can begin to pry it up. You may need to cut the carpet in parts to remove it in several pieces. Beware of the many, many staples you will find beneath the carpet, as some of these will be sharp.

    Once the carpet is removed, you will need to remove all the staples that once held it in place. This is best done using a flathead screwdriver or needle nose pliers. Double check to ensure that all staples have been removed before moving on to the next step. Once the old carpeting is completely removed, you will be left with a plywood subfloor.

    2. Clean and prepare for the new flooring

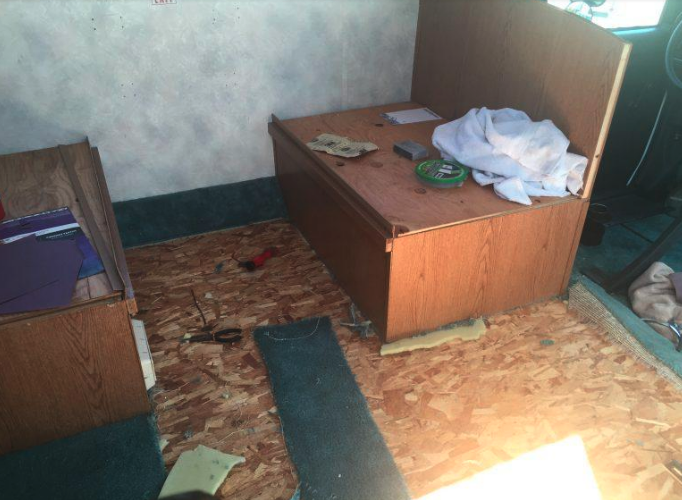
    Removing the carpet makes a lot of mess, and you will want to clean up well before laying a new floor. Sweep up all the carpet particles and staple pieces, and vacuum up and dust and dirt particles that may be floating around.

    You will also need to move any furniture that is covering the floor, such as the couch, table dinette, and/or arm chairs. If you have a booth dinette, it is not necessary to replace the flooring under the benches. Simply move the table to another area when laying new flooring beneath it.

    Finally, be sure to fill any holes or imperfections in the sub-floor to ensure that the new floor has a flat surface to rest on. Sand down any bumps or nicks, and be sure to check over the whole floor to make sure you haven’t missed anything.

    2. Measure your RV’s square footage

    Next you will need to measure the square footage of your RV so that you know how much flooring to buy. Your measurements do not need to be perfect, but they should be close to avoid inaccuracies. Don’t forget to measure each individual room, including the main room, bathroom, bedroom, and/or cab area (if you are in a motorhome).

    3. Choose your new flooring

    The biggest choice in this whole process is selecting your new flooring. Your first decision must be between wood floors and carpet. Since RVs are typically used for messy camping trips, many renovators opt for hardwood floors, since these make for less mess and easier clean-up. It is also much simpler to lay your own hardwood flooring than it is to install your own new carpeting. If you do choose to go with carpeting, you may want to hire a professional to install it for you.

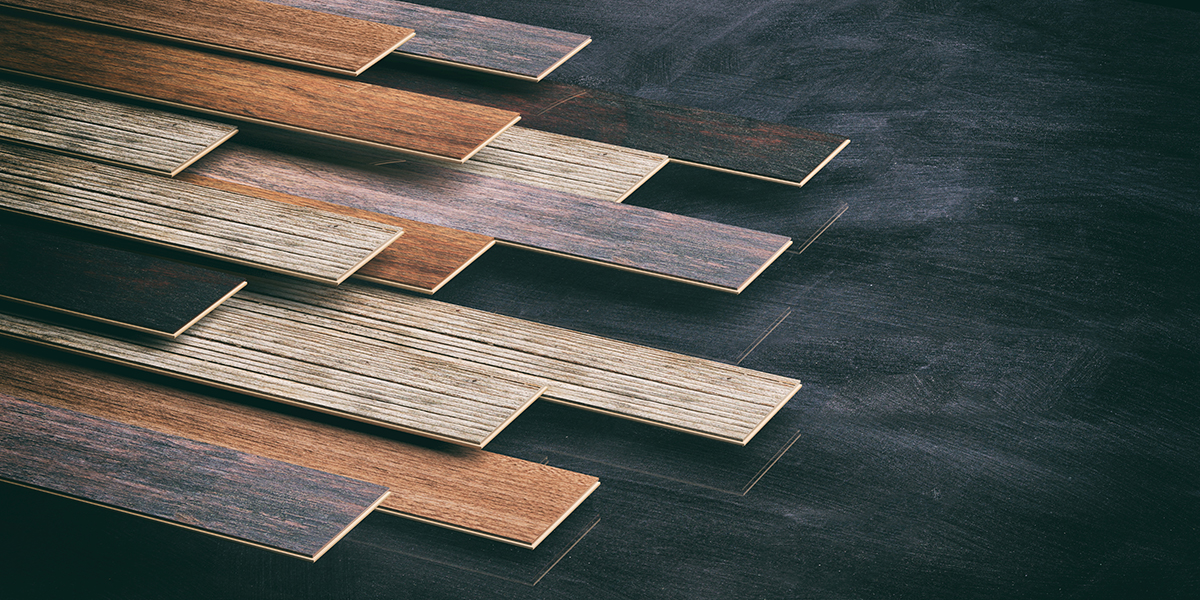
    Because you have to consider the overall weight of the RV, most people avoid laying real hardwood floors. However, wood-look laminate flooring is much lighter than real hardwood, and it tends to hold up very well in RVs. When choosing laminate flooring, you must then choose between peel-and-stick floors and click-and-lock floors.

    Peel-and-stick flooring simply involves peeling the backing off of adhesive pieces of flooring and pressing them onto the subfloor. The process is easy, and the results are great. However, sometimes these floors can shrink over time, and they can occasionally get caught in your slideouts when they are moving in and out.

    Click-and-lock flooring is a bit pricier than peel-and-stick, and the process for laying it is more involved. However, it is known for being higher quality and lasting longer. Each type of flooring has its pros and cons, so you will want to do your own research before making your final choice.

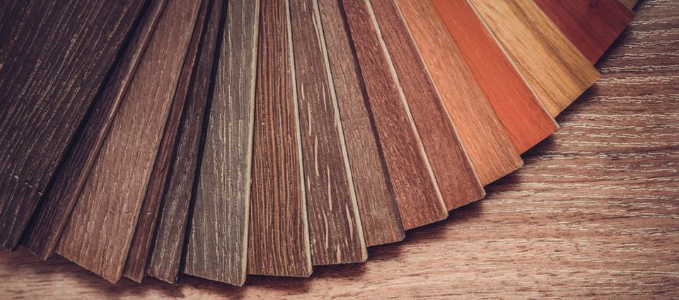
    Once you have narrowed down the flooring type you want, you can head to the hardware store to look at brand, colors, and samples. Be sure to pick a color that coordinates with the paint and color scheme, and choose a high quality brand for best results. Consider buying a single piece from your favorite types of flooring and bringing it back to the RV to see how it looks in your space.

    Once you have made your final choice, be sure to purchase more flooring than you need to allow for inaccuracies in measuring and potential mistakes.

    5. Plan for the slide

    For many people, laying new floor in their RV’s slideouts is the most intimidating part of this whole process. However, laying floors on your slideouts is really no different than laying it anywhere else in your RV. Once there is no furniture or carpeting in the way, you will just need to ensure you have a flat surface, and that the flooring will not extend past the end caps on the slideout. Once you have planned for your slides, you are finally ready to begin.
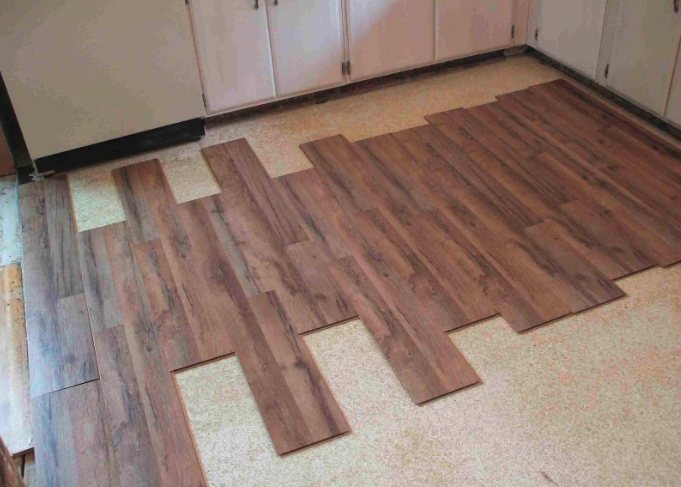
    6. Lay floor

    With all the preparation out of the way, you are finally ready to lay your new floors. You will want to watch plenty of Youtube videos before beginning this step so that you can see exactly how it’s done. If you are using peel-and-stick flooring, you may want to consider spraying extra adhesive onto each piece for better results.

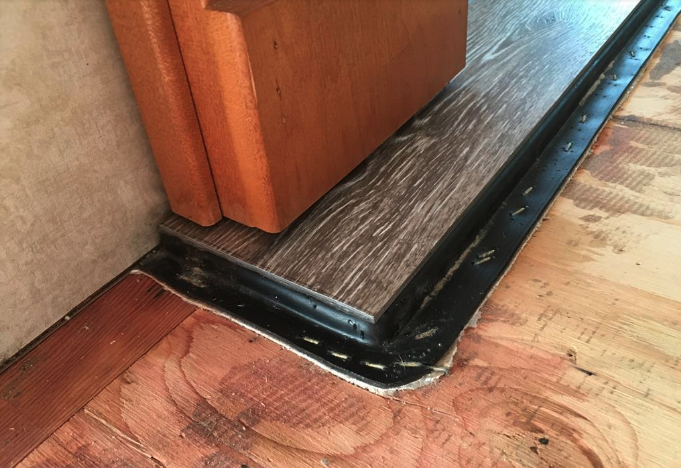
    No matter which type of flooring you use, (peel-and-stick or click-and-lock), be sure to pick a corner to start in, and work your way around the room accordingly. Work in a cohesive pattern to avoid mistakes, and stagger the floors for the best overall look. When making cuts, use exact measurements and ensure the piece will stick before applying adhesive or locking it into place. Consider using transitions or thresholds between rooms for the smoothest overall look.

    Do not rush this step. Take your time to ensure that the floors turn out as best as they can. This process may take a few days to complete.

    7. Let the floors cure

    Once you have laid new floors, you must give them a few days to rest without walking over them. This will ensure that all adhesive properly sticks and that the new floor has time to adjust to the subfloor. Once a few days have passed, you can safely walk across the new floors and enjoy your handiwork.

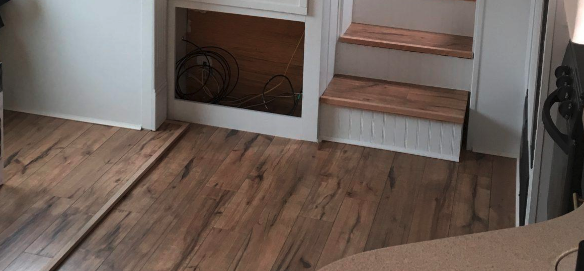
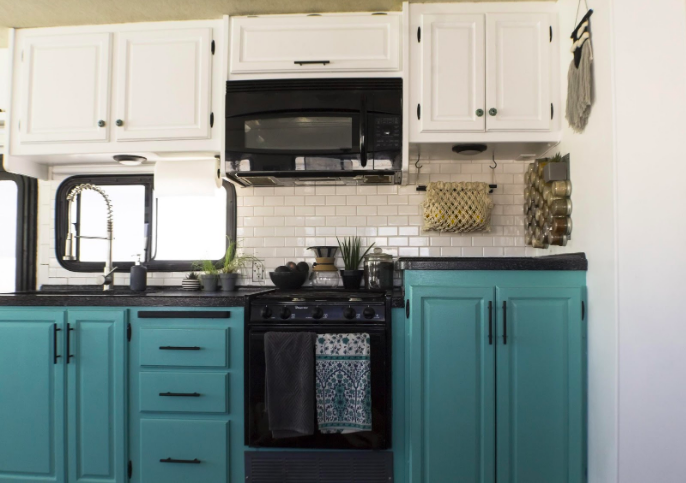
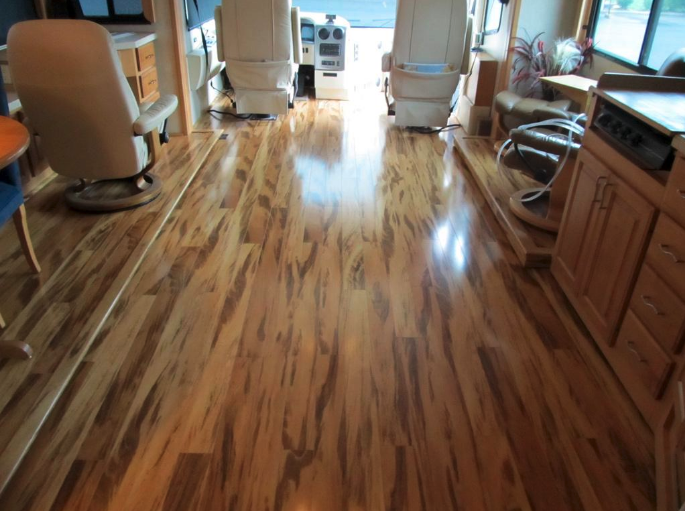
    Laying new flooring is fairly simple and makes a world of difference in an RV and will increase value if you are looking to sell. Replacing the carpet is also an especially good idea in older RVs, where the same carpet has been laid for many years. Laminate flooring is great for those who travel with pets and small children and is sure to last for years of use when installed properly. With the flooring replaced, you are all set to begin the next task in your renovation project: installing new trim and moulding throughout.

    Have you replaced the flooring in your RV? What steps did you follow? Feel free to drop a comment below!

  • 13 Tips for Avoiding Scams When Buying Online

    13 Tips for Avoiding Scams When Buying Online

    As the leading online marketplace for buying and selling RVs, RV Trader understands just how useful the Internet can be in finding your next recreational vehicle. However, it is essential that online shoppers always be on the lookout for scams. Spikes in scams occur around the holidays in retail, but they can happen all year round. Because we always want our customers to be safe, we’ve put together a list of 13 tips for avoiding scams when buying online.

    1. Confirm the Seller is Real

    A seller should always clearly provide the name of their company, as well as their physical address, telephone number, and email address (1). If they don’t provide that information, that’s an immediate warning sign. If they do provide the information, you need to check that it is accurate.

    • Plug the physical address into Google Maps to make sure the location is where a legitimate business might operate.
    • Do a search online for the phone number provided to see if it returns the company or if people report getting spam calls from the number.
    • Ensure that any email or telephone number you are given is an exact match of the contact information on the Contact Page of the seller’s official website. For example, anyone contacting you from RV Trader directly will have an @rvtrader.com or @traderinteractive.com email address – never a Gmail, Yahoo, or any other personal email provider domain.

    2. Check Online Reviews

    Leaving and reading company and product reviews has become a huge aspect of online shopping, and continues to grow. People who have been scammed by a company are very likely to have left an online review about their experience. Search for the company’s name along with the keyword “reviews” or “scam” and see what other people have said.

    3. Ask Your Peers

    Instead of only seeing what strangers have said online, ask your friends, coworkers, and industry peers if they have used the company in the past and what their experience was working with the seller. They can not only let you know if the seller would be a quality partner, but also how the seller typically communicated with them so you can know if anything seems off about their communications.

    4. Evaluate the Website

    Thoroughly review the seller’s website to make sure it looks professional (1). Most fake websites will look somewhat strange, with spelling and grammar mistakes, low-quality product images, and other oddities. This can help them naturally filter out cautious shoppers; they know that if you don’t catch simple mistakes on a website, then you’re not likely to catch their scam either. Avoid being pegged as an easy target by evaluating their content with a critical eye. You should also look for other claims on the website that could be verified. For example, if they have seals of approval or endorsement badges from a company you trust, like the Better Business Bureau, contact that company or view their website directories to check if they really have worked with or endorsed the seller.

    5. Confirm the Product is Real

    You may want to verify that any pictures of inventory are of the actual for-sale product and are not stock images from online (1). To make sure you are buying the specific product in the pictures, ask the seller for a photo of the unit that includes the seller holding a piece of paper with their name and the date, or anything else you ask for. It may be a slight inconvenience to them, but you should be suspicious if they refuse to provide the photo.

    6. Confirm the Deal is Real

    Sometimes companies really do offer amazing deals, but most of the time when something sounds too good to be true, it probably is. Scammers will often say you’ve won a prize, but claim you have to provide sensitive information and/or send them money for the taxes, fees, or shipping costs. Typically prizes don’t come with any charges to the winner, so that’s already a big red flag, but also ask yourself if the prize is reasonable or if it seems over the top. Finally, ask yourself if any deal or giveaway fits the pattern of typical behavior for the company and if they’ve offered similar deals or prizes in the past. If you’ve never signed up for a contest, or heard of the company making comparable deals to the one they’re offering you, that’s another huge warning sign.

    7. Use Caution When Clicking Links

    Sometimes a scam goes beyond tricking you into sending money, but instead involves directly stealing your identity and/or hacking your computer and online accounts. This is why you should be wary of clicking unknown links in emails or on websites. Scam links could redirect you to an unsafe site or may download a virus onto your computer. Always hover your mouse over links, which will cause a link preview to appear either by the mouse icon or near the bottom of the browser, letting you know where a link would really redirect you. It’s also a good idea to right-click on the link, copy the website address, and then search for it online to see what comes back. Only click links when you know and trust the site it leads to.

    8. Don’t Give Out Too Much Info

    When making an online purchase, typically the only information required will be your name, credit card details, and address, as well as possibly your phone number (1). If the website asks you for anything additional, especially including sensitive data like your social security number, you should be suspicious.

    9. Only Enter Info on Secure Sites

    When providing personal information, only do so on websites with an SSL or TLS encryption. These encryptions create a secure connection between your web browser and the server of the company you are interacting with, with no outside observation or interference. Websites with secure encryptions will display a padlock symbol in the address bar of your browser, and the first letters in the address bar will be “https” instead of simply “https.” Be sure you see those signs, especially when you reach the payment stage.

    10. Only Use Secure Payment Methods

    When you pay for something online, you should follow three security guidelines (1). First, always pay on a page that is secured, as we just discussed. Second, pay by credit card as you may be able to recover your money from the credit card company if fraud occurs. Third, avoid direct money transfers, as it can be nearly impossible to get your money back if you are scammed or have issues with the product.

    11. Use Credit Card Protection Services

    Many credit card companies will offer a unique credit card number that you can use for specific websites (2). These card protection services ensure that if somebody gets hold of your credit card information from a transaction on those select websites, they can’t use it on any other sites, saving you from being scammed out of significant money.

    12. Regularly Check Bank Statements

    Use your banking website or app to review the electronic statements for your credit and debit cards and checking accounts regularly instead of waiting for the physical bill to arrive (if you even still get a paper bill anymore). This helps you control any fraudulent charges and take immediate action by calling your bank or card issuer (1).

    13. Check Privacy Policies & Consumer Rights

    Seller’s should always have a page on their website detailing their privacy policy. Check this policy to make sure the company will not use your personal info for anything other than the purchase. Online businesses also must provide clear and correct information about your rights as a consumer (1). A seller should clearly describe your rights regarding returns or warranties. If a seller lacks these statements, use caution.

    We hope these tips are able to help you successfully avoid online scams, whether you’re buying a Class A on RV Trader, or any other inventory online. And we want to hear from you – what are your tips for avoiding online scams? Let us know in the comments below.

  • FMCA Tech Tip: Purging RV Propane Containers

    FMCA Tech Tip: Purging RV Propane Containers

    When one or more of a motorhome’s gas-burning appliances exhibit strange, random, or difficult-to-diagnose problems, it may signal the need to purge the propane container. Brand-new propane containers also must be purged properly before being filled for the first time. So what is purging? Does it apply to all RV propane containers? How do you know if your container needs such a service? And who can do it?

    For answers, read this how-to guide from FMCA and the “RV Doctor” Gary Bunzer:

    About Propane Containers

    Before answering those questions, let’s define the term “propane container.” Most motorhomes are equipped with horizontal propane containers bolted to the frame of the coach. Typical motorhome propane containers are regulated by the American Society of Mechanical Engineers (ASME), as documented in its Boiler and Pressure Vessel Code. A horizontal ASME container is called a tank. The capacity of an ASME tank usually is expressed in gallons.

    Some smaller Type C coaches and older motorhomes may be outfitted with upright propane containers installed in a side compartment; it’s the same type of container usually found on towable RVs or in home gas barbecue grills. Such containers (which can be vertical or horizontal) are called cylinders, and are governed by the U.S. Department of Transportation (DOT) within the agency’s Hazardous Materials Regulations. Cylinders destined for Canadian provinces are regulated by Transport Canada (TC). The capacity of a DOT/TC cylinder typically is measured in liquid pounds.

    So, generally speaking, an ASME tank is bolted to the coach, while a DOT cylinder is portable and replaceable. Both types of containers require purging at some point.

    Why Purge?

    New propane containers are hydrostatically tested for leaks before shipment. A container that is destined for an RV, whether it’s a tank or a cylinder, usually is filled with compressed air (or sometimes another inert gas) when it is shipped from the supplier. Air contains moisture and other contaminants. Purging removes the air, moisture, and contaminants; if the purge process is not performed before the container is filled with propane the first time, combustion problems or delivery line pressure irregularities may develop later.

    Unfortunately, most new motorhome buyers don’t know whether their propane container was properly purged prior to that first filling, since a new motorhome usually is delivered to the owner with a full (or nearly full) container of fuel. I suggest asking that question during the walk-through or before officially taking delivery. Ask to see the pre-delivery inspection (PDI) form for validation. It’s in the best interest of both the RV dealer and the buyer to have a proper purging verified in writing before the retail delivery of an RV.

    Purging applies to older propane containers as well. In fact, any time a container has been opened to the atmosphere, for any reason, a new purging must take place before refilling with fresh fuel. Say, for instance, the internal float assembly fails, or the shut-off valve leaks and that component needs to be replaced; the tank must be purged after the replacement, since air has been allowed to enter. And that air contains moisture and perhaps other contaminants.

    The Moisture Problem

    Even a little water lying at the bottom of a propane container can be a problem. Any moisture present from the container to the inlet of the pressure regulator can cause the regulator to freeze up. There are two types of regulator freeze-up, both with negative outcomes.

    One type of regulator freeze-up occurs as the fuel in the container becomes vaporized on its pressurized path to the regulator inlet. The pressure regulator has individual sections where the fluctuating container pressure is reduced in two steps to the delivery line pressure required by the appliances. The propane vapor must pass through small orifices in these two stages in order for the pressure to be reduced sequentially and smoothly. Propane’s “boiling point” is minus 44 degrees Fahrenheit. Below that, it exists in liquid form; above that, it vaporizes. So, any remnant of water will freeze in those small internal orifices and block the flow of propane vapor through the regulator.

    The second type of regulator freeze-up happens externally during the winter months when mud or water or slush splashes up from the roadway, freezes, and blocks the second-stage atmospheric vent opening on the regulator. If the diaphragm inside the regulator cannot breathe, it cannot regulate, and it simply locks up. That’s why it’s important for the vent portion to be positioned downward and the regulator to be covered at all times during operation.

    The result of either type of regulator freeze-up is no propane flow, and the appliances will shut down just as though the container were out of fuel.

    When To Purge

    A container that has been in use for a while may need to be purged if more than one appliance has operational issues. For instance, the furnace doesn’t ignite right away; the water heater burner sputters; the cooktop burner flame lifts off the burner; or a burner flame is abnormally large or small, or more orange than blue in color. Any operational issue with an appliance is a cause for concern and should be investigated. It simply may be an out-of-adjustment regulator or an appliance in need of cleaning, but it could also be caused by moisture inside the container.

    Who To Call

    Certified and master certified RV service technicians are trained to properly purge a propane container. As an alternative, most propane retailers also can do the procedure.

    As mentioned, new tanks and cylinders typically are filled with air when shipped, but containers already in service will contain propane. In the case of the latter, before purging, it will be necessary to remove or burn off the container’s remaining propane.

    What Owners Can Do

    Since safety is paramount, FMCA recommends an annual test of the pressure regulator, as well as the entire propane gas distribution system, by a certified RV service technician. The condition of the container also should be checked. In addition, the RV owner should test the propane leak detector periodically.

    If the propane’s odorant is ever detected, immediately turn off the container’s service valve and schedule the RV for tests.

    And RVers should always keep a close eye on how well the RV’s appliances are operating. This can be your first sign of a problem.

    FMCA RV Club brings you this monthly tip to Enhance Your RV Lifestyle. FMCA delivers RV know-how to its members. Join today and save $10 — a special offer for RV Trader readers. Learn more at https://join.fmca.com/trader18/.

    This information is for educational purposes. FMCA shall not be responsible nor retain liability for RVer’s use of the provided information. Prior to making any RV service decision, you are advised to consult with an RV professional.

  • Styling an Outdoor RV Space

    Styling an Outdoor RV Space

    When camping in their RVs, many people opt to decorate their interior spaces. In many ways, this simple task can help your home away from home to feel more personalized while you are away on vacation. However, many people forget that when decorating an RV, you can also decorate your outdoor space to add to the overall homeyness.

    Since your outdoor space can be treated like a front porch, decorating this area can make your RV feel more like home, as well as making it appear more welcoming to guests who stop by. So next time you go camping, instead of just setting up two camp chairs outside, consider the following tips for setting up an outdoor space where you will love to spend time relaxing and recharging.

    Image: RV Select


    1. Roll out your awning

    Image: RV Share

    Extending your awning is one of the easiest things you can do to set up your outdoor space. This involves no additional purchases or packing, since your RV should already come with an attached awning. Just simply set up your awning by extending it manually or electrically, depending on the type of awning you have.

    Your awning essentially sets the parameters for the space where you will be adding furniture and decorating. Establishing the exact location of your porch is important because it gives you an idea of what will fit into your porch area and what won’t. Your awning will also provide you with some shade while you are enjoying your outdoor space, so once it is all set up, you are ready to move onto the next step.

    2. Invest in some comfy and cute camp chairs

    Image: RV Select 

    Camp chairs are essential to any outdoor RV set-up. They are used around the firepit, at outdoor tables, and even just to sit outside and enjoy coffee. While there are a multitude of camp chairs on the market, it is best to invest in some that are both comfortable and aesthetically pleasing. This will help your front porch to look clean and polished. Be sure to find chairs that do not clash with your awning or exterior RV color, as this will give you a cohesive space to add to.

    3. Add a table with a tablecloth and clamps

    One of the best things about having a cozy outdoor space is the ability to eat outside. Most people prefer to eat at a table, so this is a must when styling your outdoor area. Choose a table large enough for your family as well as any friends who may periodically join you for dinner. Be sure to find a table that can collapse and stow easily for travel. Many people end up selecting six or eight-foot banquet tables that fold in half. This offers plenty of space and durability, while also while packing up easily.
    Once you have selected a table, be sure to pick out a couple of table cloths that match your outdoor colors. These will help to minimize mess, while also adding to the overall homey vibes of your front porch space. Don’t forget clamps to make sure your table cloth doesn’t blow away.

    4. Select an outdoor rug

    Image: RV Web

    Once your camp chairs and table are in place, you should add a rug to tie the whole space together. If you have chosen simple chairs and table cloths, you can select a rug with a bolder pattern or color. However, if your chairs and tablecloth are already bright and colorful, consider choosing a more subtle rug to avoid clashing. Be sure to select a rug that is optimized for outdoor use, and ensure that you find one large enough to cover a majority of the space under your awning. This will ensure overall cohesiveness and matching in your outdoor area.

    5. Hang some string lighting

    Image: Smart RVing
    While fairly inexpensive and simple, there is just something about string lighting that really adds to a space. Basic strands of edison bulbs or globe lights pulls everything together under a glowy aura that feels magical and even a bit upscale. Grab a couple of packs of your favorite outdoor string lights, and hang them on your awning in whichever way you think looks best. Some folks hang them around the edges of the awning, while others criss-cross them across the center. Whichever way you choose is sure to look beautiful and really pull everything together.

    6. Add additional decorative accents

    Image: Camp Addict

    Finally, be sure to add in some fun decor to really spruce things up. This could include anything from a wreath on your front door, to hanging outdoor plants, seasonal flags, a doorstep rug, garden decor, citronella candles (which double as bug repellant), or anything else that matches your space and makes you happy. If you have a hammock or a grill, these also add to the beauty and functionality of your porch area. Remember that less is often more, and a few simple pieces can really go a long way.

    RV camping is an excellent way to vacation, and it’s even more enjoyable when your RV truly feels like a home. We hope these easy tips have inspired you to start decorating your patio soon!

    Have you decorated your outdoor space? What items and pieces did you use? Feel free to share in the comments below!

  • Spooky Destinations: Haunted Spots Across the Country

    Spooky Destinations: Haunted Spots Across the Country

    It’s the spookiest time of the year and we’re highlighting the top 4 haunted destinations you’ll want to check out this Halloween. Get ready to pack up the RV and hit the road.

    With Halloween just around the corner, there’s no better time to plan a road trip to somewhere truly terrifying. If you’re not sure where take your RV this season, we’ve got 4 spooky suggestions for you.

    Emily’s Bridge, Stowe, VT

    Golden Brook Bridge is haunted by a ghost named Emily (thus the name) who is known for harassing cars that park there. Drivers have reported hearing noises – like footsteps or screams – even when no one is around. Others have had the ghost of Emily bang on or drag herself across their cars – leaving scratches. She is most active between 12 a.m. and 3:30 a.m. – so if you choose to stop by, make sure it’s late at night.

    Nearby Attractions:

    • Smuggler’s Notch State Park
    • Green Mountain Fine Art Gallery
    • Moss Glen Falls

    Biltmore Estate, Asheville, NC

    Biltmore Estate is a historic mansion located in Asheville on over 8,000 acres that boasts gorgeous gardens, a winery, a small village, an outdoor adventure center, and occasionally – supernatural experiences. The grounds are truly stunning – so much so that their original owner, George Washington Vanderbilt II and his wife decided to never leave. While the ghost of late George Vanderbilt has been seen around the property – many workers and visitors have reported hearing Mrs. Vanderbilt calling to her husband in the library where he will sometimes join her for a chat. Also – keep your eyes peeled for a headless orange cat that is said to roam the gardens.

    Nearby Attractions: 
    • Fork Art Center
    • Pisgah National Forest
    • North Carolina Arboretum

    Texas Ghost Tracks, San Antonio, TX

    These train tracks were the site of a tragic accident back in the 1930s or 40s (depending on the account) where a train collided with a school bus full of children. Unfortunately, all the children perished in the accident – but now it’s their mission to save anyone else who parks on those same tracks by pushing their vehicle to safety. A couple of tips before your visit – make sure to put your vehicle in neutral before you approach the tracks and sprinkle baby powder on your bumper so you can see the handprints of the children that pushed you to safety.

    Nearby Attractions:

    • San Antonio Riverwalk
    • Natural Bridge Caverns
    • The Alamo

    Rio Grande Train Depot, Salt Lake City, UT

    This spooky destination is home to the Purple Lady. This ghostly woman has been seen around the depot – but is most frequently spotted in the ladies restroom. She is said to be beautiful and always appears, dressed in all purple garb from the 1900s, looking quite forlorn. Legend says she was killed at the train station when she dove on to the tracks to retrieve an engagement ring after her fiance threw it there during a heated argument. There have also been reports of phantom parties in the basement of the building and a lone walker’s footsteps can be heard traipsing across the mezzanine every afternoon at the same time.

    Nearby Attractions:

    • Antelope Island State Park
    • Red Butte Garden and Arboretum
    • Temple Square


    Ready for a spine-tingling road trip of your own? No matter which of these destinations you choose to check out – you are sure to get in the Halloween spirit and have a hauntingly good time.

  • Drivers Beware! 9 of the Most Haunted Roads in America

    Drivers Beware! 9 of the Most Haunted Roads in America

    Drivers across the nation have spine-tingling tales of the strange and supernatural, from creepy local folktales to terrifying personal experiences. In the spirit of the Halloween season, we’ve collected accounts from 9 of the most haunted roads in America. If you find yourself driving on any of these roads, beware!

    (And if you want even more scary stories, check out our new 2020 collection of haunted tales from the road — 11 More Haunted Roads in America!)


    Route 2A, Haynesville, ME

    Twin girls were once hit and killed by a semi on Route 2A. Today, drivers say they’ve seen a pair of young girls wandering down the road, lost and confused. Those who stop to offer them a ride report that shortly after the girls get in, they suddenly leap from the moving vehicle! Drivers frantically slam on their brakes and try to find the girls, but the twins are nowhere to be seen.

    Pocahontas Parkway, Henrico County, VA

    Construction of Pocahontas Parkway unearthed a treasure trove of artifacts from the Powhatan and Arrohattoc tribes, dating back as far as 6,000 years. The disruption of sacred land has led truckers and tollbooth workers to see Native Americans apparitions holding torches on the edge of the woods by the road, and hear drum-beats, chanting, and anguished yelling break through the swirling wind on stormy nights.

    Mona Lisa Drive, New Orleans, LA

    According to legend, the rich father of a young woman named Mona forbade her marriage to a sailor. Mona killed herself in grief and the father had a statue built in New Orleans City Park to honor her. But when a group of misbehaving teens destroyed the memorial, Mona – not allowed peace in life or in death – began to haunt those who travel along Mona Lisa Drive, moaning and scratching at vehicle windows.

    Crawford Road, Yorktown, VA

    At the Yorktown battlefields, visitors report seeing ghosts from the Revolutionary and Civil Wars, and also claim to see bodies hanging from the Crawford Road bridge. In some cases, it’s the body of a woman in a white dress; in other cases, multiple bodies are seen swinging. Drivers also report their vehicle engines cutting off when they pass underneath the bridge, then seeing shadows moving and hearing unintelligible whispers.

    Messick Road, Poquoson, VA

    Years ago, a fierce storm flooded Dolly Mammy’s farm. Dolly’s daughters refused to help her round up the cattle, so she trekked out alone into the night. The next day, a neighbor stumbled upon a foot sticking out from a sinkhole; Dolly had suffocated in the bog. Today, drivers on Messick Road still report seeing a lantern-carrying apparition in the marsh – Dolly Mammy looking to rescue her cows, and punish her daughters.

    Clinton Road, West Milford, NJ

    Clinton Road is pitch black at night, with no street lights and several sharp turns, but it’s not just dangerous – it’s also haunted. There are multiple stories of phantom headlights appearing out of nowhere and following drivers before disappearing. The road also includes a bridge, where a young boy once drowned. It is said that if you throw a coin over the bridge, he’ll throw it back at you, then chase you back to your car.

    Bray Road, Elkhorn, WI

    Since the first European settlers reported canine monsters who would attack and disappear without a trace, travelers on Bray Road have continued to glimpse a large creature resembling a bear or wolf. In rare accounts, the Beast of Bray Road runs through the forest parallel with the vehicle, able to keep up not only on all-fours, but also on two legs, before vanishing into the brush. Might the Beast of Bray Road be a werewolf?

    Archer Avenue, Chicago, IL

    As the story goes, a young woman named Mary was walking home from a dance when she was killed in an unsolved hit-and-run incident. Mary’s parents buried her in Resurrection Cemetery. For decades, there have been stories of drivers near the old dance hall picking up a young hitchhiker wearing a party dress. She says nothing except to ask to be let out at the cemetery, where she suddenly vanishes into thin air.

    Kelly Road, Ohioville, PA

    Surrounded by dense, dark woods, Kelly Road sits on land cursed years ago by a sinister cult. When animals traverse Kelly Road, they are said to suddenly turn rabid and violent, attacking anything they see, including their owners. Imagine the horror of driving down the road when your pet unexpectedly lunges at your throat with snarled teeth, forcing you to keep them at bay while trying to maintain control of the moving vehicle.

  • Your October RV News Fix is Here

    Your October RV News Fix is Here

    Between the Hershey RV Show and RV Open House, we’ve seen A LOT of news break in the RV industry this fall. And as always, we are here to break down the top RV stories you need to know. Check out some of the recent headlines below. Hint hint… get ready for some new models!

    Image: WOF

    First Completely Electric Motorhome is Officially on the Market

    A few months back, the world’s first completely electric RV was revealed at a German trade show, and now this unit – the Iridiumis – is officially on the market in Europe. During the trade show, the unit only had a range of 124 miles, but now the Iridium comes with a 249 mile-range with the motorhome’s highest battery pack. The interior of the Iridiumis is fairly standard including a bathroom and shower, kitchen, and a double bed. The 249-mile Iridium will cost buyers $219,000, while the 186-mile version comes in at $188,000. We’re interested to see how this unit does in the market, and if similar electric versions will make their way to the U.S. Read More.

    L’air Camper Co. Reveals Super-Light Travel Trailer

    L’air Camper Co. just came out with their brand-new fiberglass trailer and it made its debut at this year’s RV Open House Show. The new model is extremely lightweight and easy to tow. The camper weighs in at just over 2,000 pounds due to its fiberglass exterior. The compact camper might be small, but it includes all the comforts of home like a kitchen galley, full bath with shower, and room to sleep up to four people. We’re excited to see this unit out on the open road. Read More.

    Image: Yahoo! 

    CEO of Trader Interactive Highlights the Current State of the RV Market

    Lori Stacy, CEO of Trader Interactive, recently shared her thoughts on the state of the RV industry with Yahoo! Finance. Although the overall RV market has seen a decline in sales over the last year, things are looking up for the industry when it comes to first time and millennial buyers. To learn more, check out her segment here.

    Image: Winnebago

    Winnebago Debuts New Class B RV at Open House

    This year’s Open House was filled with new models and this includes a new Class B from Winnebago. The manufacturer revealed the Solis, their new Class B RV aimed specifically towards the millennial market. The new unit features a “pop-up” sleeping area that extends off of the roof of the vehicle for added space and a murphy-style bed in the lower level. The combined space sleeps up to four people in just less than 20ft of living space – we’re impressed. The unit has a workspace area for all of the full-timers out there as well as a curtained outdoor area to rinse off sand for all of you beach lovers out there. If you’re ready to experience #Vanlife – check this unit out for yourself.

    You’re officially all caught up on the RV news you need to know this month. Which stories interested you? Let us know your thoughts in the comments below and stay tuned for more news.
  • FMCA Tech Tip: Winterizing Your RV: Air vs. Antifreeze

    FMCA Tech Tip: Winterizing Your RV: Air vs. Antifreeze

    Unless you’re one of the lucky RVers heading south this time of year, fall’s cooler weather means it’s almost time to winterize your RV. The how-to of winterizing can be a hot debate (pun intended). FMCA has tips to help you decide the right option for your RV.

    About Winterizing

    Winterizing deals primarily with the plumbing system and protecting your RV from freeze damage. All water must be removed from holding tanks, water lines, and plumbing fixtures. Two methods are performed to winterize RV plumbing: using air pressure to blow moisture out of the system or pumping antifreeze through the water lines.

    Which should you use? The answer depends on where you live and the complexity of your RV’s plumbing system.

    Air

    Air is easy to use; just connect an air compressor to the water hose and blow everything out. In theory, the system will be dry. Plus, air is free, so it eliminates the need to buy bottles of antifreeze. Air pushes most of the water out, but residual water can remain in water lines’ low spots where it can freeze, expand, and cause damage.

    In a simple RV with minimal plumbing lines, using only air may not be an issue. But if you live in a place with long, cold winters, using air may not be enough to protect your RV from freeze damage.

    Antifreeze

    RV professionals consider antifreeze to be the best method for preventing freeze damage. Keep in mind that it differs from automotive antifreeze. RV antifreeze is nontoxic and is safe to use in fresh-water systems. It freezes but does not solidify. Instead, it turns to slush, which will not expand to crack fittings or water lines.

    One drawback to antifreeze is that it can be messy and requires buying a few gallons every season. It also can cause water from treated lines to taste bitter.

    More Resources

    For detailed, step-by-step instructions on the winterizing process, click here.

    Join the air vs. antifreeze debate. Check out this video from “RV Doctor” Gary Bunzer.

    FMCA RV Club brings you this monthly tip to Enhance Your RV Lifestyle. FMCA delivers RV know-how to its members. Join today and save $10 — a special offer for RV Trader readers. Learn more at https://join.fmca.com/trader18/.

    This information is for educational purposes. FMCA shall not be responsible nor retain liability for RVer’s use of the provided information. Prior to making any RV service decision, you are advised to consult with an RV professional.

  • Painting an RV: Part II

    Painting an RV: Part II

    With the increasing popularity of RV ownership, many people choose to renovate their RV interiors. Renovating allows for individuality and personalization, and there are so many projects you can complete in the process of modernizing an RV. Painting your RV walls and cabinets is one such project that, arguably, yields the most results.

    Previously, we discussed how to prep your RV interior for paint. Prep work involves smoothing all walls, sanding, cleaning, and taping and covering all areas you don’t want painted (see previous post for more details). Once your prep work is done, you are ready to begin the task that will show actual results: painting! Follow along with the steps below for best results.

    1. Choose your paint

    This might just be the most important decision in your whole painting process. Paint colors should be chosen alongside the RV’s overall color palette. After all, in a space of less than five hundred square feet, it is even more important to select specific colors that match a cohesive theme. This will ensure that your finished product looks polished and classy.

    Head to the hardware store and select your favorite color swatches from your preferred paint brands. Bring home a variety of swatches and hold them against your RV walls. Envision them filling your space, and ask friends and family for their opinions. Consider taking a few days to think about your choice before you begin. This is a big decision and you don’t want to rush it.

    Paint colors are a personal preference but it is often recommended to stick to neutral tones in tiny spaces. For instance, white is great for opening up a space and making it look bigger – which is why it is a popular choice amongst RV renovators. However, many are wary of choosing white because it can also be a challenge to keep clean and fresh. Paler grays are also popular, as they are easier to keep clean and still brighten up the space while keeping it neutral.

    Bright colors are fun, but they can also make a small space look tacky if used in excess. If you are wanting some color, you may want to consider painting just an accent wall here or there. If you choose to paint in all neutrals, you can always use decorations, furniture, blankets, throw pillows, rugs and more for pops of color.

    Once you have chosen your colors, you will need to choose your desired paint finish. There are many different opinions and preferences, but most agree that cabinets should be painted with a gloss or semi-gloss finish. This makes them more durable and easier to clean. Walls, on the other hand, can be painted in whichever finish you prefer. Eggshell and satin tend to have a lower-gloss look and are easier to clean than matte paint.

    2. Gather your supplies

    Once you have chosen your paint colors, head to the hardware store to gather your supplies. You will need painting trays, disposable paint tray liners, a paint roller handle, disposable rollers, paintbrushes, and, of course, paint and primer. Be sure to purchase a variety of roller sizes for all the different surfaces in your RV. Two and four-inch rollers are great for cabinets and smaller surfaces, while six and eight-inch rollers are excellent for walls and other larger spaces.

    In addition, select the best quality paint brushes and rollers that you can find. This way, you will avoid leaving bristles and lint behind in your paint to ensure a smoother finish. Finally, consider buying more supplies than you need to avoid additional trips to the store. You can always return the extras when you are finished, and this will be less inconvenient than having to pause your project and head to the store multiple times.

    3. Test your colors

    If you carefully selected your colors, pictured them in your RV, and asked friends and family for advice, it may feel unnecessary to test the colors in your RV. However, this step is crucial to ensuring that your final product is exactly as you envisioned it. Paint a small section of a few different areas in your RV, and allow the paint to dry for a few hours. If the dried product looks good, you are all set to move forward with the final steps. If it is darker or lighter than you expected, or if you don’t like the finish, it is time to head back to the hardware store to select and test some more colors.

    4. Apply primer

    Although there are many paint and primer combination products, applying primer separately has many benefits. When covering darker walls or cabinets, you will need a few layers of paint for full coverage. This means that you will likely not paint a single coat of paint and be done with this project, so you might as well take the time to apply primer.

    Primer will serve as a buffer between the walls and your final coat(s) of paint. It will also ensure better paint adherence and durability. For best results, be sure to choose a higher quality primer (such as Kilz or Zinsser Cover Stain) and paint one or two coats. Allow the primer to dry for a minimum of twenty-four hours between coats for the best and longest lasting results.

    5. Paint!

    Once you have completed steps one through four, you are finally ready for paint. To avoid drips and runs, paint during the day when the sun is out. For best visibility, open all windows and turn on all the lights in the RV. If the paint runs or drips, be sure to smooth over it before it dries.

    If all goes well, you will only be painting your RV once. Go slow and take your time to minimize mistakes and imperfections. For full coverage, it is best to apply at least two coats of paint. As with the primer, allow the paint to dry at least twenty-four hours between coats for best results.

    Although it is only the first step in the renovation process, painting yields big results. When you have finished painting, your RV will look like an entirely different space. This may leave you excited to move onto the next step in the process. Be sure to check out the other guides in this renovation series to learn how to replace your floors, install new lighting, and more.

    Have you painted an RV before? What was the process like? Feel free to share in the comments below! And if you haven’t already, don’t forget to check out Part I of our RV painting series.
  • Painting an RV: Part I

    Painting an RV: Part I

    Renovating an RV has become an increasingly popular challenge in recent years. A simple search of the “RVrenovation” hashtag on Instagram will instantly yield photos of thousands of brightly-colored, modernly-designed units all over the world.

    The reasons for remodeling an RV interior differ, but the main motivation stems from a desire to make an RV your own. Many RVs come from the factory turn-key ready, but some people feel that these lack personality and individuality. Additionally, older RVs from different eras (8+ years old) are often outdated in the decor department and in need of some serious sprucing. Still, others may just not match the taste and style preferences of their respective owners. Whatever the reasons for beginning an RV renovation and whatever projects you have planned, your very first project should be painting.

    Painting an RV is no small job. While the surface area of the total space may be small, there are many nooks and crannies, which makes painting time-consuming and labor-intensive. In addition, there is quite a bit of prep work involved. In order to ensure that the paint adheres to the surface, you must sand, clean, and tape, all before beginning the actual paint job. To get started – you’ll want to:

    1. Decide where you want to paint

    The very first step to painting is deciding exactly which surfaces you plan to paint. When renovating an RV, many people paint both the walls and the cabinets. Others decide to paint the walls and leave the cabinets with the original wood-grain look. No matter which surfaces you decide to paint, determining this ahead of time is important because it will let you know which areas to prep. Once you have decided where to paint, you can move on and start your prep work.

    2. Flatten out all surfaces to be painted

    Most people paint right over the wallpaper in RVs. Removing wallpaper is a sticky and messy process, and there is really no reason to complete this extra step prior to painting. However, if there are wallpaper borders present, these must be removed before painting. Failure to remove these will result in a bumpy and uneven surface, and the finished product will not be as polished.

    Most wallpaper borders in RVs can be found in either the kitchen or the bathroom. To remove these, simply slide a thin tool under the border to begin peeling it up, and pull the border away from the wall. There will be some resistance, but it should eventually peel off in one piece. If you are unable to remove the wallpaper, try melting the glue with a heat gun. Scrape any excess glue off the walls once borders are removed.

    Additionally, you must fill any and all holes or nicks in the walls with putty if you want a smooth final appearance. Allow the putty to dry for at least six hours before moving on to step three.

    3. Sand all surfaces to be painted


    Sanding is arguably the most important step of the painting process. Assuming your RV will travel to a variety of climates in its lifetime, it is especially important to ensure that the paint adheres to the walls as best as possible. Since RV wallpaper and cabinets are typically covered in a glossy, laminate finish, you must be sure to remove this before you can paint. Failure to complete this step will result in a finished product that is extremely prone to peeling and does not hold up well over time.

    It is best to sand with an electric sander and some 80 or 120-grit sandpaper. Any size sander will get the job done, but a smaller, hand-held sander will be easier to maneuver into tight spaces. Be sure to sand all surfaces that will be painted. This will take up quite a bit of time, but it is very important and worth every second when your final painted product lasts for years.

    3. Clean thoroughly

    After sanding, everything in the RV will be covered in a thick layer of dust. It is vital that you clean up all of this before painting. If you don’t clean well, residual dust may stick to your paint as it is drying, discoloring it, and leaving the walls looking perpetually dusty. Thoroughly wipe down all countertops, and then vacuum and sweep up all dust particles on the floors.

    Next, wipe down the walls, cabinets, and any other surface that will be painted with TSP. Otherwise known as trisodium phosphate, TSP is a heavy-duty cleaner that is diluted and used for cleaning surfaces that will later be painted. You can find it at any hardware or home repair supply store.

    4. Remove hardware 


    If you are painting your RV cabinets, you will need to remove all cabinet doors and drawer faces before you can begin to paint. It is best to do this after sanding so that you don’t have to sand these on a tabletop or on the ground. In addition, you should remove all hardware (hinges, handles, etc.) to ensure that you can paint as closely as possible.

    NOTE: If you have plastic or metal hardware, it is best to remove the hardware prior to sanding the cabinets.

    You must also remove all outlet covers, lights and light switch covers to ensure they are not accidentally painted. You can complete this step with either a screwdriver or a drill with an appropriately-sized bit.

    5. Tape Before You Paint

    This is the final step of prepwork. Before painting, you must tape off anything that is not going to be painted. This includes the ceiling, floors, baseboards, appliances, windows and anything else that you do not want to accidentally paint. Be sure to tape carefully and as closely as possible for best results. If you are not planning to replace your flooring after painting, be sure to cover the floors in drop cloths to avoid drips.

    Once you have completed all of these steps, you are ready to gather your supplies and begin painting. Keep an eye out for the next post in the series, where we will discuss painting tips and tricks that are sure to leave your RV looking good as new.

    Have you painted an RV? What did you do for prepwork? Feel free to share in the comments below! And don’t forget to check out Part II of our RV painting series.